I was not really expecting SharePoint 2016 to come again (like in the case of SP2010 and SP2013) with settings who are not allowing long running uploads.
As announced part of the SP2016 new improvements features, it is possible to upload files large up to 10 GB. I can’t resist to not write this is what Microsoft defines it as “boundary“. In reality you can upload files larger than 10 GB. OK, but this is what Microsoft defined as limit and most likely the support will be provided in that context.
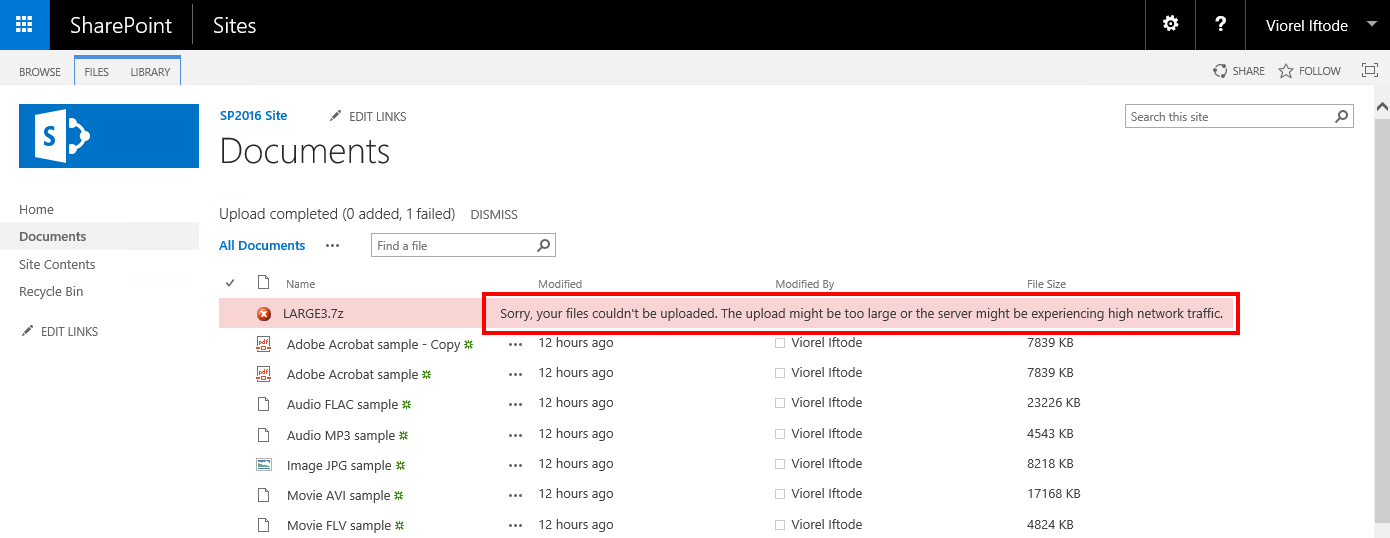
However, no matter if we discuss about files up to 10 GB or lager, the upload will still fail in case is a long running one (large file upload over limited bandwidth).
Sorry, your files couldn’t be uploaded. The upload might be too large or the server might be experiencing high network traffic.
Why?
Because out of the box IIS & SharePoint are not tuned properly!
How to fix it?
This article is not talking about how to modify the “Maximum Upload Size” – I will not cover such basic setting. This article is for those who tried almost everything and are ready to give up.
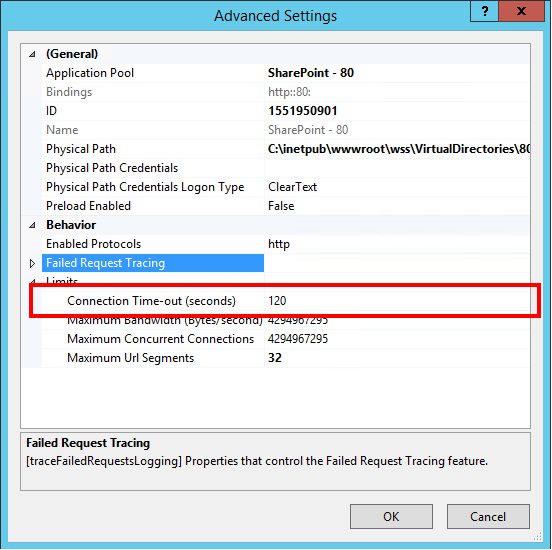
1. Make sure the default 120 seconds connection time-out is not changed (IIS web site settings).
Go into the IIS console and for each affected web site modify the Connection Time-out (seconds) settings – set it to 120. Perform this for each Web Front End server part of your SharePoint farm. In case you published your SharePoint farm through an ARR NLB, make sure the IIS part of the ARR is also configured with same settings.
Start -> Administrative Tools -> Internet Information Services (IIS) Manager -> select the web site you want to configure -> click Advanced Settings… (right side of the console) -> Connection Time-out (seconds) -> set it to 120 -> click OK.
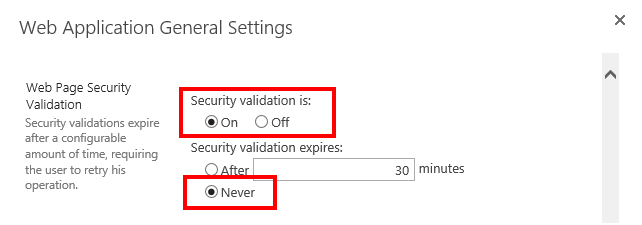
2. Adjust the Web Page Security Validation associated to you SharePoint Web Application.
Central Administration -> Manage web applications -> select the affected SharePoint Web Application -> click General Settings -> Web Page Security Validation -> Security validation expires: Never.
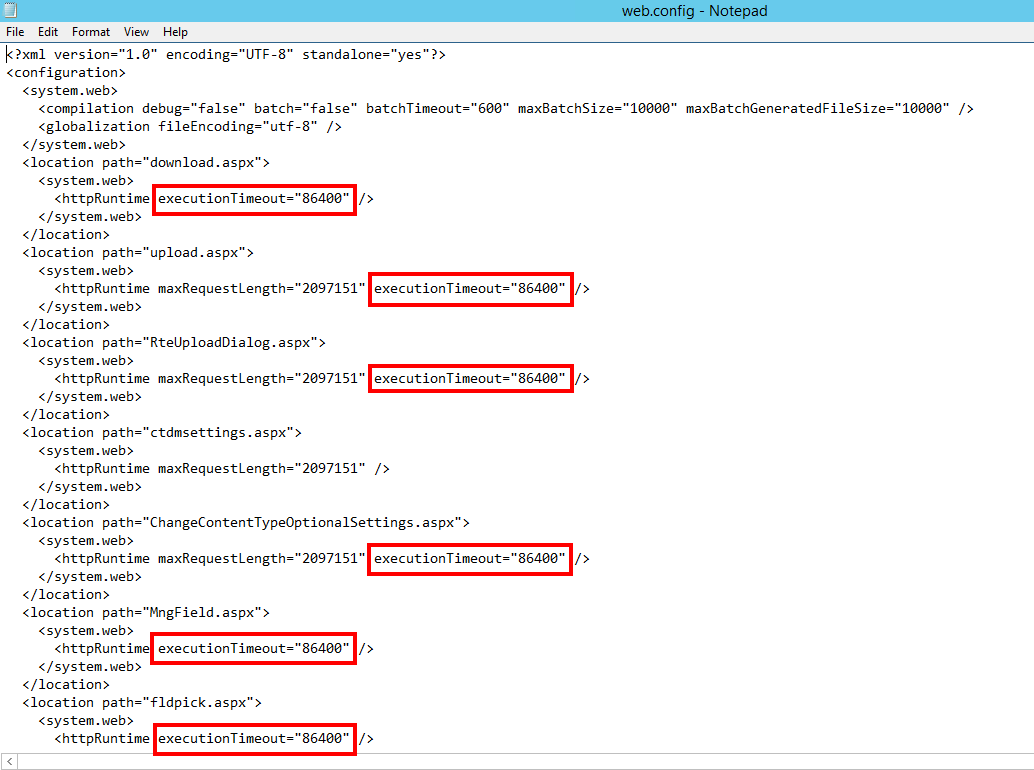
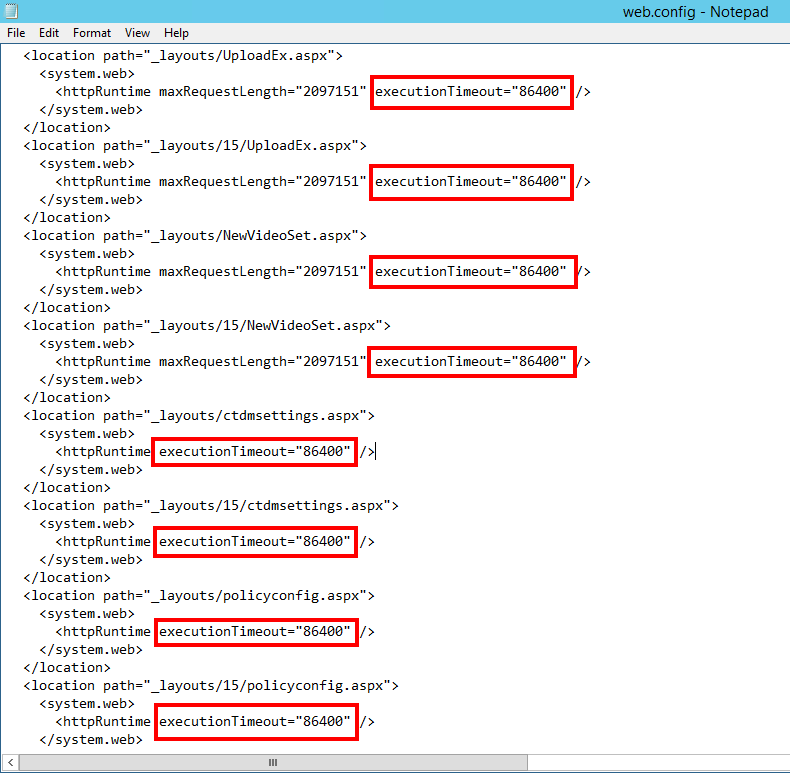
3. Adjust the C:\Program Files\Common Files\microsoft shared\Web Server Extensions\16\TEMPLATE\LAYOUTS\web.config settings.
The web.config located on C:\Program Files\Common Files\microsoft shared\Web Server Extensions\16\TEMPLATE\LAYOUTS controls the behavior of the drag & drop upload. Locate all the entries where executionTimeout is defined and adjust the value to 86400. Yes, I recommend for all entries. In case you deal with low bandwidth clients, all the SharePoint features should take in consideration long running operations. Perform this for each Web Front End server part of your SharePoint farm.
4. Adjust the SharePoint Web Site web.config.
Locate the web.config part of each SharePoint site affected by the long running uploads/downloads and adjust all settings where executionTimeout is defined. Set the new value to 86400. Perform this for each Web Front End server part of your SharePoint farm.
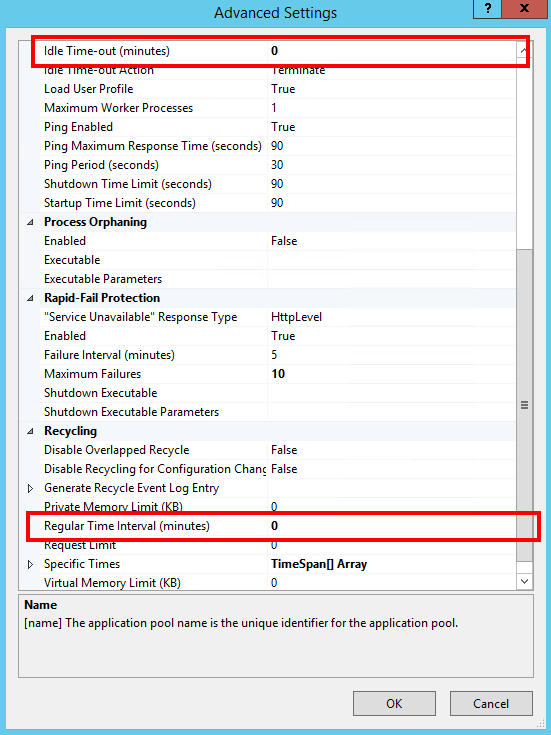
5. Adjust the IIS App Pool Recycling and Process Model settings.
Start -> Administrative Tools -> Internet Information Services (IIS) Manager -> Application Pools -> select the application pool associated to the SharePoint site -> right click Advanced Settings… -> Regular Time Interval (minutes) -> set it to 0 -> click OK.
Start -> Administrative Tools -> Internet Information Services (IIS) Manager -> Application Pools -> select the application pool associated to the SharePoint site -> right click Advanced Settings… -> Idle Time-Out (minutes) -> set it to 0 -> click OK.
0 is the default setting for the IIS App Pool part of the SharePoint IIS Web Sites, but it is good to verify these values especially if you published your SharePoint farm through an ARR NLB.
Results
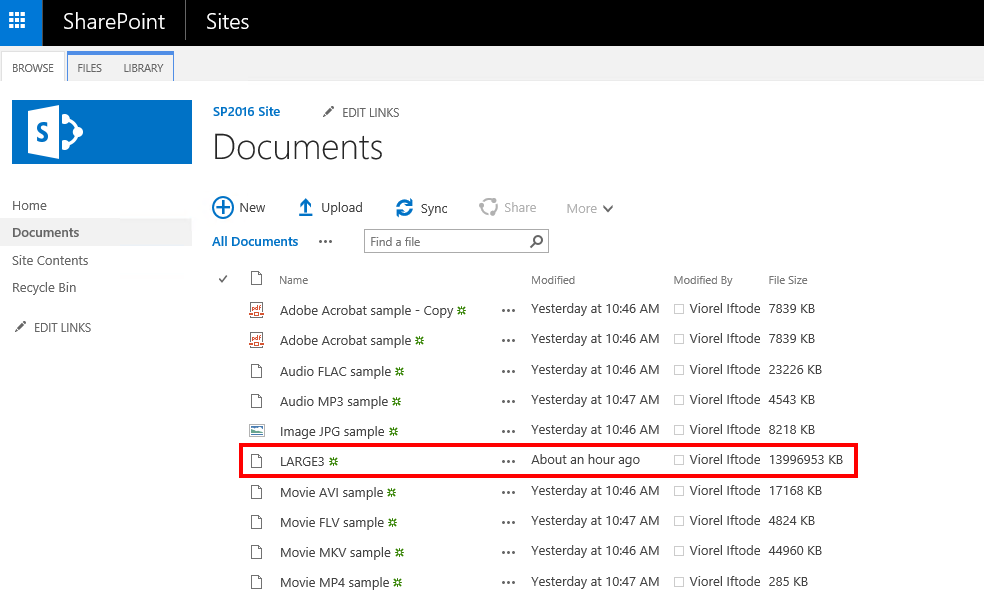
In my tests I was able to configure one client machine to have a bandwidth limit of 2 Mbps. I started a (9.79 GB) file upload who took around 10 hours to complete -> and the file successfully uploaded. Very important! These settings will help you to configure the servers to accept long running uploads, but all these settings will not help if the network connectivity has interruptions.
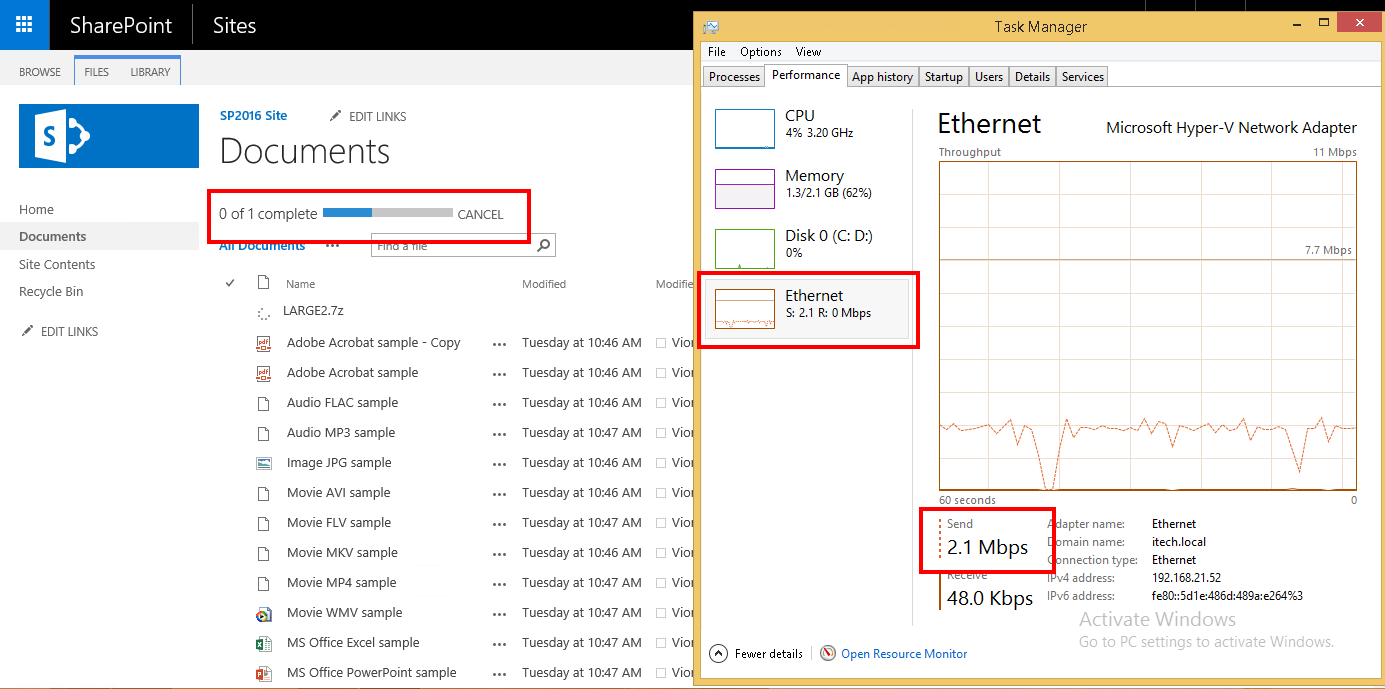
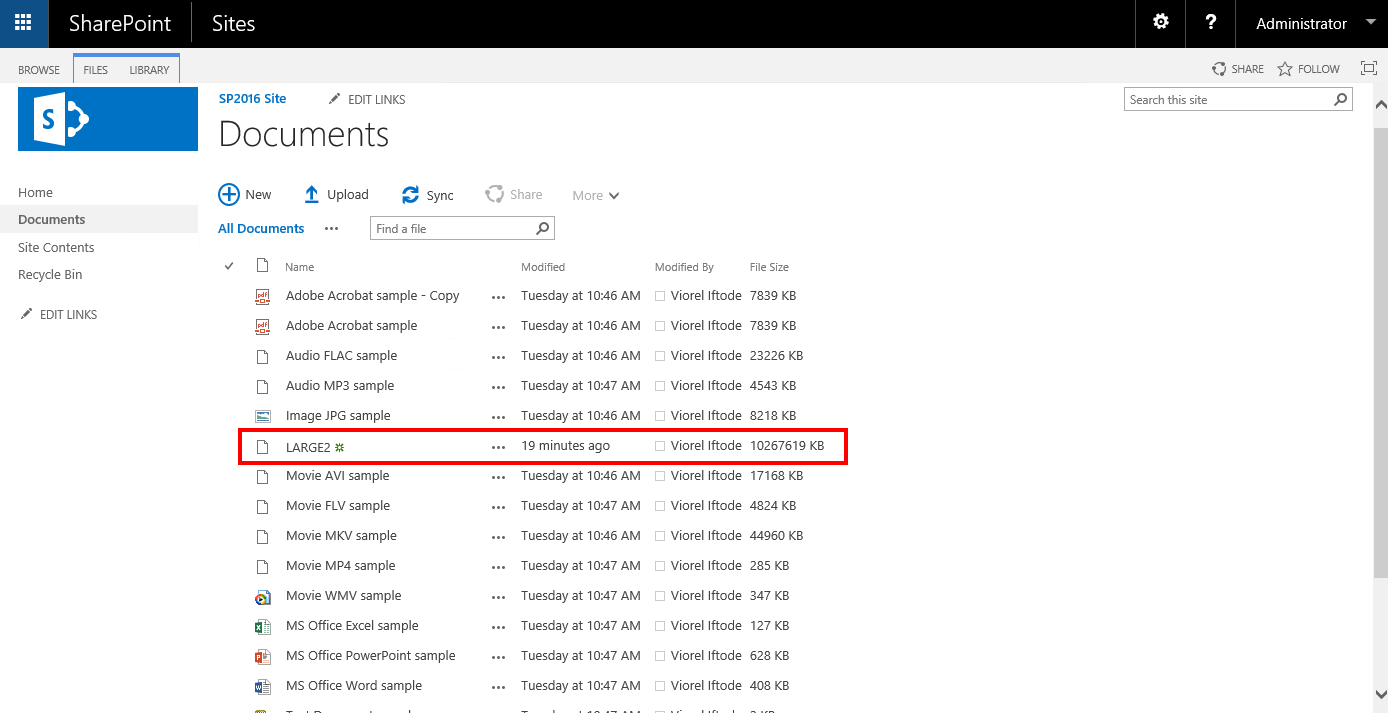
While the file is in “uploading” state it is marked as having 0 KB. Please notice the modified time (8 hours) – that time was actually the time since the upload began.
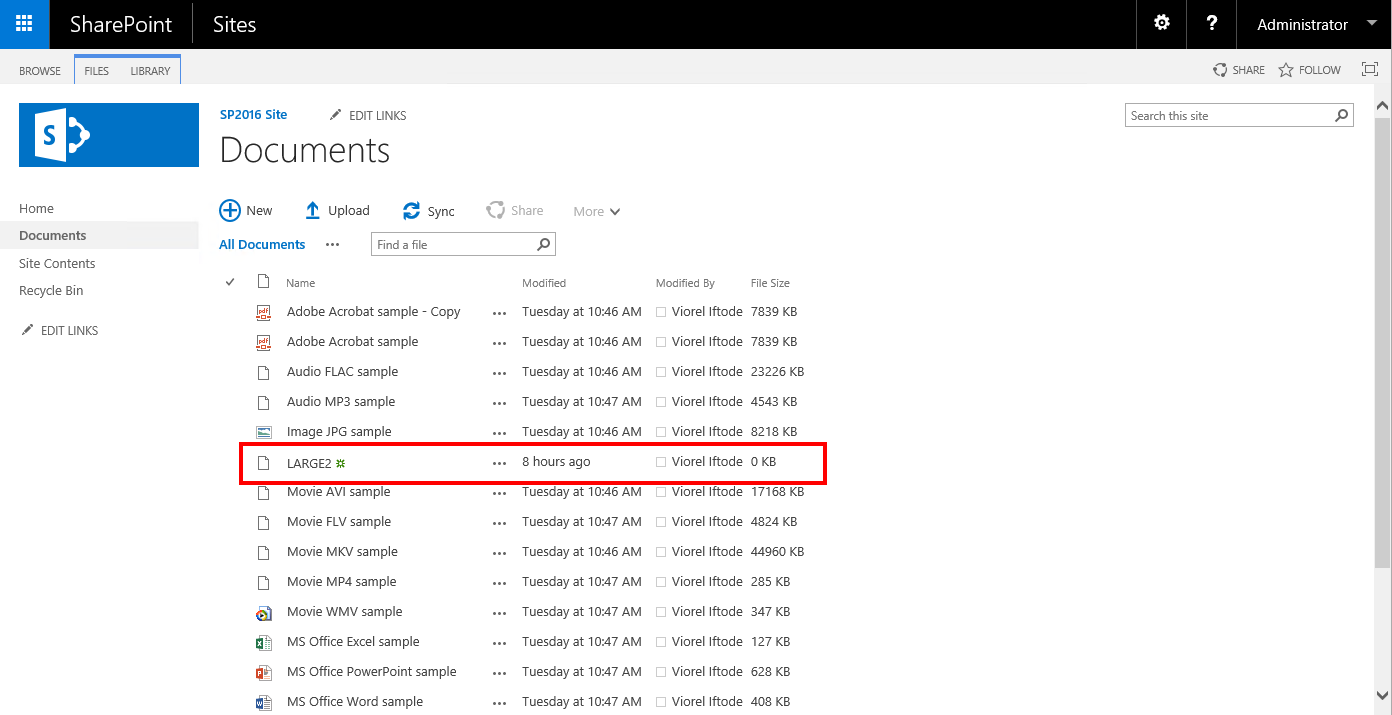
After approximately 10 hours the upload successfully completed.